Showing posts with label graphics programming. Show all posts

Tuesday, June 28, 2016

Shimmerblade: A Side-Scrolling Platform Game

One of my newest and more promising game prototypes is a side-scrolling platform game, using retro 2D game mechanics (reminiscent of the 8-bit and 16-bit era of gaming where side-scrolling platformers dominated), while using 3D models and modern graphics techniques.


The game is inspired by some of my childhood gaming memories, borrowing ideas and elements from (apparently quite obscure) games like 'Wonderboy in Monster Land' and 'Wonderboy 3: The Dragon's Trap', both of which I played extensively on my Sega Master System back in the early 90s.


Wonderboy in Monsterland

Wonderboy 3: The Dragon's Trap


I started work on it in early February of this year (2016) and made significant progress between then and the end of May (realised that you can get a lot done in four months if you push really hard, start with a lot of good content, and make good re-use of code from previous projects). During the early stages the focus was on implementing basic side-scrolling platform game mechanics. I re-used some code from one of my projects from a few years ago called 'Shroomsters' (albeit with a fair bit of modification).

I'm targeting PC for a change so that I can focus on nice visuals without too many limitations. It's a nice change from mobile and allows me to not worry about overall scope and technical limitations as much.


I put a lot of work into the visuals -- tweaking materials, coding up various shaders and getting the post-processing effects looking good. The scenes are crafted by hand (with the help of some high-quality outsourced art). I've made use of various post-processing effects, including bloom, screen-space ambient occlusion, radial light scattering (sunshafts / god rays) and FXAA (anti-aliasing achieved via post-processing).


The scope of the game is quite a bit larger than other projects I've focused on in the last two years or so. Previously I had made the decision to deliberately scope down my games because my older, more ambitious projects turned out to be too much work to complete by myself in a reasonable time frame.

As such, rather than working toward a complete product, my initial goal is to finish a vertical slice -- that is, a portion of the game (a quarter of the final game, for example) that is complete and playable in something resembling its final, polished form. From there I can release it as a demo and, depending on how the cards fall, decide how to proceed. Despite some solid progress, a lot of work still remains. By the end of May I had run out of steam and progress slowed, but I hope to get back into it soon.


On a related note, others seem to share my enthusiasm for the Wonderboy games and have also begun working on similar projects. These are larger companies with teams of artists working on them full-time, so even attempting to compete with them would be futile. Fortunately, I've taken a fairly different approach and so mine has a very different look and feel.

I definitely plan on playing the aforementioned games when they're ready though (they both look amazing). One is Wonderboy: The Dragon's Trap (a modern remake of the original Wonderboy 3). The other is 'Monsterboy and the Cursed Kingdom' (inspired by the original, rather than being a remake).


Friday, July 10, 2015

Bloody Glade Update

The Bloody Glade is a side-scrolling hack-'n-slash / light RPG targeting mobile devices (primarily iPad and iPhones right now). I started work on it at the start of the year and have devoted a lot of time to it.

It's larger in scope than some of my previous personal projects, but I tried to keep the scope of the game at least manageable. I was inspired to create it when playing through the original Golden Axe (I have it as part of a retro Sega game pack for PS3). I spent a lot of time in the dingy arcade section in a shop down the road from my childhood home playing it when I was about 9 years old, so it brought back fond memories.

I could complete Golden Axe in about 20 minutes, and I liked the idea of a fairly short session where you could actually get through a game, even if it is fairly mindless and straight-forward button-mashing (though I've tried to add a bit more strategy into The Bloody Glade).


A few nights back I spent a lot of time creating a new world map (I wasn't satisfied with what I had before). I wanted to give the player the option to choose between various routes to give some incentive to replay the game once completed. Getting the map to have the feel I wanted was quite frustrating and time-consuming, but I'm happy with the end-result.


At the moment I am planning on making 3 playable characters: the wizard, the enchantress and the abomination. I have around 8 enemy character types so far. Getting enough content in is a concern (the moment a game starts visually resembling the larger, professional games people are used to, they start to expect more overall), but I'll deal with that later.


The spells I've implemented so far are a fireball, an ice orb, hailstorm (reminiscent of the ice blizzard in Warcraft 2), earth shatter (pretty much an earthquake) and lightning storm (which at the moment is a bit over-the-top, but fun). I have another one where a dragon swoops down partially implemented, though it looks pretty cheesy at the moment (a friend laughed when he saw it, that bastard).


The game has a few RPG elements, including a very basic inventory system and leveling
system. These have been deliberately keep very simple though, since I want to target a broader, more casual audience than the typical RPG player, and avoid overly complex game mechanics. At the moment, most of the game mechanics revolve around:
  • selecting which characters to attack
  • choosing when to consume health and mana potions
  • deciding when to cast spells (some of which require quick-time events to be cast successfully) and who to target
  • choosing which spells to learn when leveling up
  • choosing a route to follow in the world map
I have a few plans for adding to this a bit (I want it simple, but not too simple, I don't want it to feel like a brainless exercise in simply tapping on bad guys). So far it actually feels fun so I'm feeling optimistic.


Below are a few of the items that have a chance of being spawned by slain enemies. Each item gives you a perk / buff. When you die there is a resurrection penalty (i.e. you can continue the game, but at a cost). One of the potential penalties is removing items you have collected.


Saturday, March 22, 2014

Fractals With Shaders

I spent the last few hours experimenting with writing shaders to display fractals. I'm using the Julia Set (named after French mathematician Gaston Julia, who devised the formula). The Julia set requires a set of seeds to be fed in. I base mine on the sine of the application time (so the fractals shift and change over time). I also modify the ratio between the two components of the seed in a similar way, which varies the patterns quite a bit.

A demo can be downloaded from here:

Here are a few screenshots.


Monday, July 15, 2013

Minor Updates to Surreal Landscape Demo

This weekend I did a but of work on my surreal landscape demo. I re-modelled the jellyfish (more detailed and better looking) and re-worked their animation (I'm just doing it in the vertex shader via sine and cosine waves at the moment).

I added some basic trees to get a feel of what it will look like once I start adding more foliage. I also added a bit more vegetation (cycads). I'm using instancing for almost everything at the moment, and so I'm using texture atlases (multiple textures combined into one image, with each instance able to use any of them). When setting up each instance, I randomly choose a texture offset which controls which image in the texture atlas is used. Each instance also has a random rotation, scale and colour modifier, resulting in greater variety whilst still keeping the number of draw calls to a minimum.


I also re-worked the way I handle bloom. Prior to this I had a very simple method in place, which I had hobbled together just as a placeholder until I had some time to do it properly. I was doing a Gaussian filter both vertically and horizontally in one pass as opposed to filtering first horizontally, and then vertically in a separate pass. I am doing it correctly now (separate horizontal and vertical passes) so as to reduce the number of filter samples required. Additionally, I wasn't performing the bright pass before passing them into the filter -- instead I was performing it at a later stage, in the final post-processing shader stage. This resulted in halos around dark objects, because the bloom buffer contained blurred parts of both bright and dark parts of the image resulting in darker parts 'bleeding' over into brighter parts of the image. This is now fixed (note that the screenshots accompanying this post were taken before the current fix, so there may still be minor colour bleeding present in these images).


I also decided to alter various post-processing parameters based on the time of day. I found that I could tweak the post-processing parameters to make the scene look good for certain lighting conditions, but that the lighting conditions differed significantly enough that no single collection of settings looked perfect in all conditions. I now have various sets of variables for use in different lighting conditions. These include parameters that control the bloom bright pass (bloom exponent and bloom multiplier), as well as parameters that control the very last phase of the post-processing pipeline -- contrast and saturation.

I find that after applying bloom some of the colours are over-saturated. Although I am going for a fantasy dream-world feel, I don't want it to look too cartoony, so in order to get the visual results I want I increase the contrast and reduce the saturation of the final image so as to give it a slightly more gritty feel.

Thursday, July 11, 2013

More Surreal Landscape Screenshots

I did a bit more work on my surreal landscape demo. Last night I added jellyfish-like creatures that float in the air.

The intention is to eventually have a full ecosystem which gives a genuine sense of being alive. I want all creatures to interact with other creatures and with the environment. I've implemented a flocking algorithm so far and it looks pretty good. I also have red alien plants (visible in the screenshot below) that emerge and grow at night (and glow subtly), and mushrooms that emerge as the camera draws near. But ultimately I'd like to have some creatures hunting other creatures, far more complex group movement behaviours, creatures feeding off plants or attracted to lights, more plants growing as you watch, and so on.


The demo already feels very alive -- grass sways in the wind, the clouds are somewhat volumetric and move across the sky, planets in the sky move in an (admittedly physically-inaccurate but nice-looking) orbit and water ripples. This combined with the various creature types wandering the landscape and plants growing / emerging in real-time, gives a very vibrant, dynamic feel to the scene. Still, I want much more, even if I have to only feature some elements at a time (it might end up feeling a bit overwhelming). I've also been considering having it support the Oculus Rift when my dev-kit finally arrives.

The engine uses NVidia's Cg language for the shaders, a library called AssImp for supporting many mesh formats and a library called FW1FontWrapper for displaying text onscreen (a task that is surprisingly cumbersome in D3D11). Other than that, its just pure Direct3D 11 and standard Windows calls (oh, and also Direct Input 8). Eventually I'll bring across some of my sound code from other projects, which uses OpenAL and Ogg-Vorbis (which allows me to use the .ogg format, which has similar compression quality to mp3 but fewer useage restrictions).


I've fixed my engine clock (it had a flaw in it that caused delta time to vary based on frame rate). I brought across some code from Transcendence (an old D3D9-based game engine I developed in 2008) to replace the timing code with older, more thoroughly-tested code.

There are various different timing methods available, with the four most common being the functions clock(), timeGetTime(), GetTickCount() and the Microsoft-specific function QueryPerformanceCounter(). I support all four (I can alter which one I use at run-time), simply because I wanted to test for myself which one was most reliable. Strangely, although the general consensus is that QueryPerformanceCounter() is the most reliable (albeit with some work-arounds required on multi-core systems to prevent glitches), I have found clock() to be just as sound (even more reliable than QueryPerformanceCounter() on some systems), and timeGetTime() pretty close as well.


Sunday, September 26, 2010

Implementing Particle Systems in Transcendence.

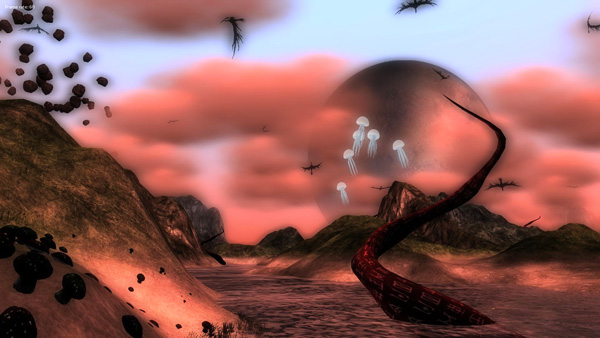
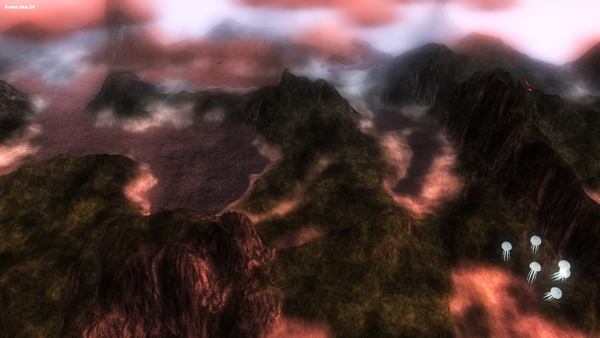
This weekend I added a particle system framework to Transcendence Engine (my own 3D games and simulations engine which I intend on using for future 3D projects). I already had a sprite / billboard class in the engine, and so one would think that implementing particles would be as simple as creating many of these and controlling their behaviour at run-time based on various parameters read in from some data file.

However, this would have been a very inefficient solution because it would mean that each particle is rendered in a separate draw call. Once we reach a few hundred particles we would incur significant driver overhead and our graphics engine would quickly become CPU limited, preventing us from leveraging the power of the GPU.

The solution instead was to create a dynamic mesh class, which has a dynamic vertex buffer (but static index buffer), allowing us to modify the vertex data on the fly. In this way, the entire particle system is treated as a single object and is rendered using a single draw call instead of potentially many hundreds of draw calls.

I spent a fair bit of time on designing this part of the system, because having a well-designed dynamic mesh class is hugely advantageous to other areas of the engine as well. For example, my ocean surfaces are implemented as flat, well-tessellated grids whose vertices are deformed in the vertex program based on the summation of sine waves. This looks pretty decent by older standards, but does not hold up against some of the uber-realistic water shaders we see in demos and cutting edge games today. Using sine waves is limiting -- ideally you want perlin noise. This is doable in vertex shaders if you use vertex texture sampling (and I do intend to explore this route). However, performing the vertex deformation in the application itself rather than in the shaders is advantageous because (a) vertex texture sampling is not always available, and (b) your application has full knowledge of what is happening in the scene and can thus have the water surface respond to other stimuli (for example, barrels or crates being dropped into the water). In short, a dynamic mesh class has many uses beyond being used only for particle systems, and so some careful design and planning was warranted.

Having implemented and tested my dynamic mesh class I was ready to move onto using it to implement a particle system class. This part was pretty straight-forward. I've worked on this sort of thing at both Digital Extremes and ThoroughTec, and have also worked with Ogre's particle systems a lot; most particle system classes tend to expose a similar set of parameters.

Mine is at a fairly early stage and does not support anything too fancy. Currently the parameters that control particle system behaviour are:
- particle life time
- particle fade in time
- particle fade out time
- initial particle dimensions
- scale rate
- emission frequency
- number of texture divisions
- initial velocity in object space
- acceleration in object space
- acceleration in world space

I chose to have explicit fade in and fade out times, assuming that particles will always start off fully transparent and fade in, and will also always fade out again at the end (any other behaviour always tends to look jarring). My scale rate is additive rather than multiplicative because I prefer a stable, constant change in size rather than having particles shrink drastically the smaller they are, or quickly balloon out when they become large. Most particle systems I've worked with expose an emission rate rather than an emission frequency (for example, emit 10 particles per second rather than emit a particle every 0.1 seconds). I decided that an emission frequency is a little more intuitive, perhaps not to us programmer types, but to artists. For example, a particle emission rate of 0.5 means emit a particle every two seconds, but may confuse anybody who is not mathematically inclined (does it mean we emit half a particle every second?). I'm not trying to insult the intelligence of the intended users here -- I just feel that if there is an alternative that is clearer and less likely to cause confusion, that is the better option.

The last point is the velocity and acceleration. Ordinarily you would just need a single acceleration value in world space to allow for forces like gravity and wind. This would allow, for example, smoke or dust to sail across the scene as if being carried by the wind, or water emitted from a fountain to eventually slow and fall back to the ground.

However, I chose to add an additional parameter here, differentiating between acceleration in object space and in world space. Having an acceleration that works in object space (by this I mean that it works relative to the position and orientation of the emitter) allows for interesting particle behaviours that work as intended even when you rotate or move the particle system as a whole. For example, I have used it for an explosion effect where the particles, after rushing outward for a while, suddenly reverse direction and rush back inward, giving an imploding effect instead. Not particularly realistic, but great for fantasy or sci-fi games.


Another important part of implementing the particle system framework was integrating it into Transcendence Engine's resource system. Transcendence supports hot-loading, which in our case means either that (a) if the relevant option is enabled, if you modify a resource the engine picks it up immediately and the results are instantly visible in-game, without you having to re-start, or (b) if the relevant option is not enabled (for performance reasons) you simply need to instruct the engine to check for resource changes by selecting an option in a menu or hitting a hotkey. It is very gratifying to tweak a few textures, re-size a mesh, alter a line in a shader, then alt-tab back to the engine (which was running the whole time), hitting F11 and watching all of the changes instantly take effect.

It seemed to me that tweaking particle parameters was another situation where instant feedback would be very advantageous, and so from the start I planned it so that it would fit into Transcendence's resource framework. The particle system itself is not regarded as a resource (since multiple instances of the same type may exist). Instead, I provide a separate class called a ParticleSystemTemplate, which inherits from the Resource class, provides its own resource handler, and thus gets all of this behaviour for free. Each time a particle system is created, it asks the particles resource handler for a pointer to the particle system template associated with the given file name. If we modify that file while the engine is running, the changes are detected and the resource handler instructs the particle system template to re-load itself. The particle system class, in its update function, detects that a dirty flag has been set on the particle system template, and it then re-constructs itself.

While developing the particle system framework I was made aware of some short-comings in my graphics object class hierarchy. The intention of this class hierarchy is to automatically allow new graphics objects types to be created and inserted into this hierarchy, and have them automatically support frustum culling, casting and receiving shadows, having their transform matrices handled, having their materials applied and having their shader parameters updated. A good few hours of re-factoring were required to make the system work as intended, but in the end it turned out well. Particle systems are currently culled using axis-aligned bounding boxes (which are updated on the fly). I do not currently intend to provide support for individual particle culling (I do not believe it would provide performance benefits). As for casting and receiving shadows, this is currently untested, but in theory, once the shaders are correctly setup, it should just work.

At this point the technical work for my particle systems is close to complete. The end result is a particle system that is efficient (fewer draw calls, fits into the culling framework) and which supports hot-loading.

In future I intend to implement soft particles in Transcendence. Soft particles is a technique that improves the visual appeal of particle systems by having them become transparent at points where they intersect other surfaces. For example, without support for soft particles, smoke rising through a vent on the ground would not look quite right, because the hard, straight line where the particle intersects the geometry representing the vent would be very obvious and jarring. Soft particles work by having the pixel shader sample the scene's depth buffer so it can compare its own depth to the existing scene depth. If the two results are very similar the pixel is made transparent. The end result is that particle's no longer have that unrealistic hard-edged appearance when intersecting other scene geometry. Another great benefit of soft particle support is that other surfaces (most notably water) can be rendered in the soft particle layer. I implemented soft particles in ThoroughTec's in-house engine a few months ago. Although it works really well for dust and smoke, the most noticeable visual improvement was to our water, which now has a soft transition as it meets the shore. The terrain for our current project has an extensive network of rivers, as well as oceans and lakes. The lack of hard edges makes it look significantly more realistic and has improved the overall look of the terrain.

There is a moderate amount of work required before Transcendence Engine is ready for this, but it should be pretty straight-forward to repeat the process.

Implementing thermal imaging.

Over the last two days I've been working on simulating the thermal imaging sensor (TIS) for a military training simulator project. This supports two modes, white hot and black hot. In white hot mode hotter objects are brighter. The sky tends to be dark grey to black, the terrain varies from dark grey to white (for hot sand and roads during the days), and people and vehicles tend to be light grey to white. Black hot is just the opposite (hotter objects are darker), which means I only really needed to implement white hot, and added a final step in my post-processing shader which inverts the image when black hot is enabled.


Previously I had implemented night vision and incorporated it into our post-fx pipeline. This entailed adding a custom high contrast bright pass filter, a green filter (tweaked in various ways to match the reference videos) and a grainy effect (similar to film grain). The excessive contrast works well with the bloom part of the pipeline to give a realistic looking dramatic blooming effect when parts of the rendered image becomes brighter (for example, when weapons are fired).

I used the same part of the post-fx pipeline to implement thermal imaging, but applied a greyscale filter instead, and used significantly less contrast. At this stage the result was a grainy greyscale image, but there was no differentiation between hot and cold objects.

Looking at the reference videos I observed that there is significantly more contrast on thermal imaging camera during the day than at night. I implemented this in the application code itself rather than in shaders. We have a dynamic time of day and weather system which allows for any time of day and weather combination, each with its own set of diffuse, ambient, fog and sky parameters. When thermal imaging is enabled I intercept the calls to set these parameters and supply an alternative set of parameters that match the reference videos. Fortunately, I had reference videos showing TIS enabled during transitions from day to night and vice versa, so I could run the video alongside our simulator, dramatically increase the time elapse rate in our simulator, and observe the results as I tweaked the values. As for the sky, I modified the dynamic skydome shader so that it bypasses the part where it derives colour for various regions of the sky based on time of day and weather, and outputted a single colour based on time of day instead.

In the reference videos the foliage tends to range from dark grey to black (it would seem that plants aren't particularly warm). This was easy enough, I simply intercepted the calls to the SpeedTree API and modified lighting and fog parameters to give the desired look.

At this stage the scene looked very close to the reference videos for the most part, except for hot objects -- we needed some way to make infantry and vehicles stand out white against the dark backdrop. Initially I was going to do this with shaders -- either in the specific shaders for the infantry and vehicles or via post-processing. However, in the real world various vehicles have very specific heat signatures. For example, some tanks are specifically designed so that they have low heat signatures, so that they don't stand out when TIS is enabled. Similarly, many tanks, trucks and even infantry show very specific heat patterns. For example, a tank may appear dark everywhere except around its engine, which glows white, allowing it to be uniquely identified by a knowledgeable observer. As a result, a generic solution such as this would not suffice.

To obtain realistic results we needed the artists to provide an additional set of customized textures, one for each vehicle and infantry unit type. When thermal imaging is enabled, the graphics engine is instructed to swap out the default set of diffuse maps for an alternative set of heat maps. The final result is a final rendered image that is very close to the real thing.